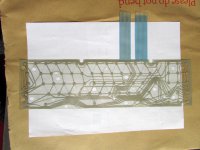
While Quazar have started making proper switch-based mechanical keyboards for the SAM, the stock machine came with a membrane-based keyboard, much like the Spectrum. These are prone to going wrong over time and, after almost 30 years, mine has become a little flakey. Since I can't currently afford the mechanical keyboard, I had been on the lookout for a new stock of membranes on the SAM Users' Facebook group, and snapped one up as soon as their availability was announced. It arrived with this morning's post:
While I've opened up my SAM a couple of times, the keyboard is effectively its own self-contained unit, which I'd never touched till now. Having seen a few of the keyboards removed from Amigas down at the Club, I was a little nervous about the prospect of the keyboard itself being held together with half a million screws but, thankfully, it wasn't too bad:
Opening the case - 6 screws
Then two ribbons need to be detached from the motherboard
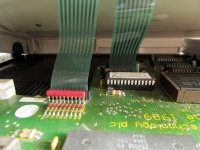
They're quite awkwardly placed - the sockets on the board being a few millimetres to the left of where they come out of the keyboard unit - and the ribbons are barely long enough to raise the case sufficiently high to admit my hands... But I managed.
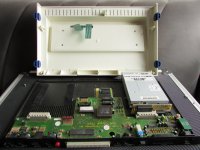
Removing the keyboard from the case - 4 screws
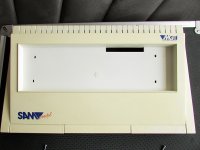
Naturally, the area of case below the keyboard is substantially less yellowed than the outer parts - I got a little nostalgic, thinking back to the days when the whole machine was that white... But what's that, on the bottom left of the keyboard cavity?
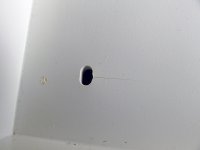
Quite a crack... but, thankfully, it doesn't seem as though the whole thing is about to break up. There's signs of similar fractures around a couple of the other screw holes, but not as bad. I'd imagine the screw was overtightened at the manufacturing stage.
Opening the keyboard - 12 screws!
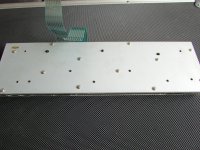
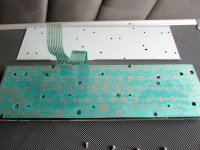
And here's where I found the biggest surprises: 30 years of grot. Easy enough to clean between/behind the keys themselves with a sprayduster, but I wasn't expecting to find more below the keyboard's frame...
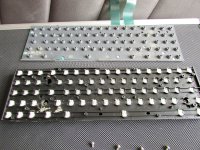
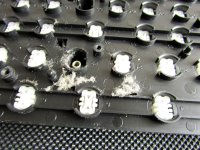
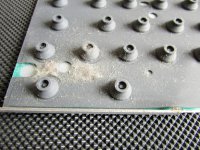
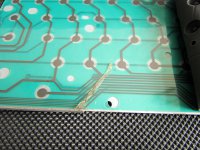
It seems like the 'spare' holes on the two shift keys and the return key are a bit of a lint trap, but the fossilized strip of Sellotape was probably the weirdest part. No idea how or why that would have been in there, but it appears to have got caught on the metal part of the keyboard casing.
Also worth noting the branding - and dating - of the original MGT keyboard membrane:
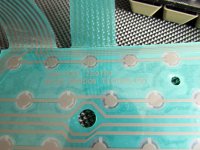
Manufactured 26th July 1989, I take it..?
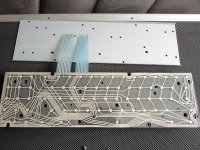
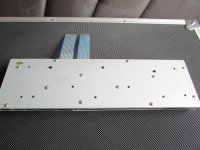
So, new membrane placed... and then, 12 screws later...
Then back into the case and, a further 10 screws later, SAM is all back together again (and slightly cleaner than it was before...). Not a bad experience, overall, but even with this new keyboard membrane, I am still coveting the clicky, mechanical keyboard from Quazar. Very high on my Want List, once I'm back in gainful employment.

While I've opened up my SAM a couple of times, the keyboard is effectively its own self-contained unit, which I'd never touched till now. Having seen a few of the keyboards removed from Amigas down at the Club, I was a little nervous about the prospect of the keyboard itself being held together with half a million screws but, thankfully, it wasn't too bad:
Opening the case - 6 screws
Then two ribbons need to be detached from the motherboard

They're quite awkwardly placed - the sockets on the board being a few millimetres to the left of where they come out of the keyboard unit - and the ribbons are barely long enough to raise the case sufficiently high to admit my hands... But I managed.

Removing the keyboard from the case - 4 screws

Naturally, the area of case below the keyboard is substantially less yellowed than the outer parts - I got a little nostalgic, thinking back to the days when the whole machine was that white... But what's that, on the bottom left of the keyboard cavity?

Quite a crack... but, thankfully, it doesn't seem as though the whole thing is about to break up. There's signs of similar fractures around a couple of the other screw holes, but not as bad. I'd imagine the screw was overtightened at the manufacturing stage.
Opening the keyboard - 12 screws!


And here's where I found the biggest surprises: 30 years of grot. Easy enough to clean between/behind the keys themselves with a sprayduster, but I wasn't expecting to find more below the keyboard's frame...


It seems like the 'spare' holes on the two shift keys and the return key are a bit of a lint trap, but the fossilized strip of Sellotape was probably the weirdest part. No idea how or why that would have been in there, but it appears to have got caught on the metal part of the keyboard casing.
Also worth noting the branding - and dating - of the original MGT keyboard membrane:

Manufactured 26th July 1989, I take it..?
So, new membrane placed... and then, 12 screws later...


Then back into the case and, a further 10 screws later, SAM is all back together again (and slightly cleaner than it was before...). Not a bad experience, overall, but even with this new keyboard membrane, I am still coveting the clicky, mechanical keyboard from Quazar. Very high on my Want List, once I'm back in gainful employment.
Last edited:
