CosmicCruncher
Well-known member
- Joined
- 4 Jun 2021
- Messages
- 200 (0.00/day)
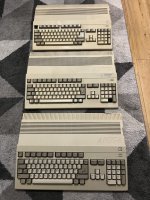
Completing my Amiga collection are these three machines...
Uno) Amiga 500 Kickstart 1.2
Dos) Amiga 500 Plus
Tres) Amiga 500 Kickstart 1.3
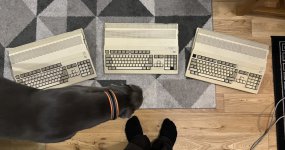
(Sniffing out fishy caps, he didn't seem to find any)
I would like to get all the machines in decent working condition with some small quality of life upgrades. There are no major underlying issues with any of them that I know of so this should be a fairly easy project. I will be doing bits to my A1200 and A600 as well so this might all take some time. Check out my threads for those.
Lets start with the oldest Kickstart 1.2 A500. This one seems to have taken a beating with damage to the casing, a missing key cap and is a bit grubby but otherwise looks ok. This will also be a nice one to break me back in to the Amiga, I've never used them heavily so once again will be a learning experience.
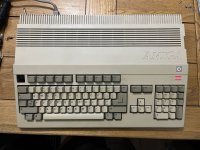
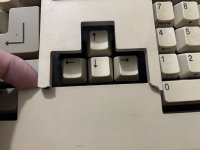
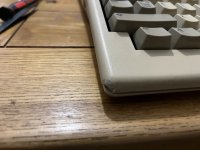
I took the opportunity to open up the case and inspect the board. I also discarded the RF shielding. Apart from being a bit dusty and dirty in places looks ok.
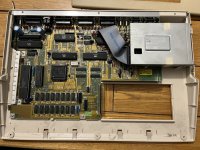
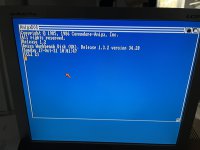
I ran the Amiga Test Kit Diagnostics by Kier Fraser, all tests pass ok which is good news. The disk drive works without issue, loaded a number of disks. With the fundamentals looking good I decided to fully strip down and clean the machine.
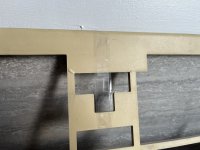
First thing I wanted to do was attempt to repair the broken casing, if held in the right position the crack next to the cursor keys was barely visible so should be a relatively easy repair. The scuff on the corner I've left as is, not sure there is much that can be done with that. I opted for araldite epoxy for the repair, much stronger than superglue and probably now the strongest part of the case. After a couple of hours it has set enough to remove the excess but was still soft enough to do with a sharp blade. I then used a bit of scotch brite to smooth it, probably not the best thing to use but it was within arms reach .It did a pretty good job. The finished result is smooth to the touch with hairline crack just visible.
Here it is mid repair prior to removing the excess epoxy:
In the meantime I set about washing the rest of the casing and stripping the keyboard. The keyboard wasn't awful but you can't beat a fresh clean keyboard on these old machines.
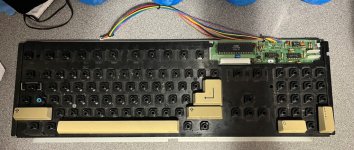
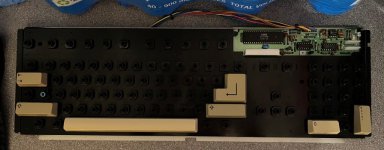
I removed all the keys apart from the larger ones with support brackets, didn't want to push my luck by breaking something and I was still able to get underneath to clean. Here is a before and after shot:
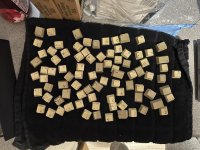
Keys out to dry after washing:
Once fully dried I set about reassembly. Definitely more satisfying than pulling it apart .
.
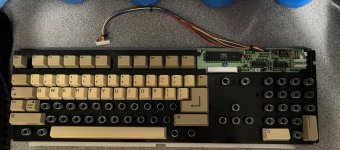
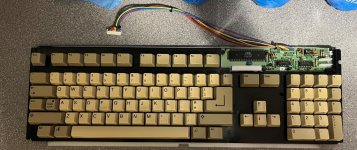
Just after that tense moment where you hope you haven't misplaced any springs. The eagle eyed will notice there is now an escape key, I stole this from the A500 Plus. This keyboard was purely a missing keycap and spring with the stem still intact and working. The 500 Plus is missing the decimal point key from the number pad but it looks like the stem itself is either missing or crushed so that one will need a more in depth repair when the time comes and I can source the required parts.
Fully reassembled at last:
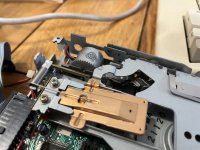
Once all the casing was dry I set about reassembly. While partially assembled I open up the floppy drive, gave the heads a clean and put a bit of lithium grease on the drive rails and motor spindle. The drive is still rather noisy when seeking but a little better. For those that have come across more than I have, are some of the drive mechs inherently more noisy than others depending on the design? They could have been like this from new for all I know, the newer 500 w/1.3 Kickstart is much quieter. I also gave the expansion edge connector and trap door connector pins a quick clean with some IPA.
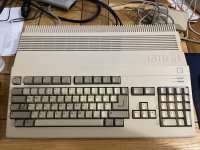
With that complete I set about completely reassembling the machine. Here is the finished result, I am very pleased with how it has turned out. I re-ran the diagnostics, rechecked the keyboard etc and all looks good.
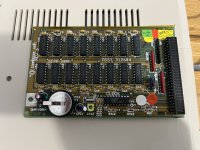
I have a couple of upgrades in the works for this one. Firstly I have installed an A501 RAM expansion, this actually came out of the other 500 (more on that RAM expansion to come in another thread, it involved a Varta battery). For display I purchased a Retro Computer Shack RGB SCART cable.
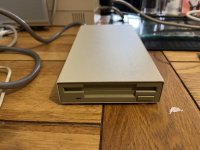
In the post I have a DF0 / DF1 switcher to allow booting from an external floppy drive, I decided to keep the internal drive, I much prefer the look over a Gotek, even the more discreet ones. I intend to run a Gotek externally for loading self booting games as DF0 or use as DF1 to allow me to save my work when carrying out productivity tasks with Workbench or whatever programme I'm using loaded from the internal floppy drive. Note when the external drive is switched to DF0 the internal drive gets disabled, hence me still intending to load Workbench etc from the internal drive when I want multiple drives available to cut down on disk swapping. This might sound like a bit of a faff but I'm happy enough with that solution for now, bear in mind I'm building my A1200 Checkmate project which will be my 'big box' Amiga with Compact Flash drive and the other niceties of that platform.
I'm also weighing up buying a USB mouse adapter, anyone used one or have a particular recommendation for one of these?
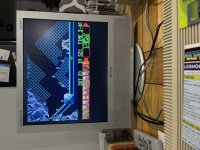
That's about it for now, more to follow soon. I'm planning to try and spend some time with this particular Amiga now so will report back some of the stuff I'm doing with it as I go. Restoring these machines can be a hobby in itself, sometimes you forget to get involved and use them. I'll leave you with a game of Lemmings:
Uno) Amiga 500 Kickstart 1.2
Dos) Amiga 500 Plus
Tres) Amiga 500 Kickstart 1.3


(Sniffing out fishy caps, he didn't seem to find any)
I would like to get all the machines in decent working condition with some small quality of life upgrades. There are no major underlying issues with any of them that I know of so this should be a fairly easy project. I will be doing bits to my A1200 and A600 as well so this might all take some time. Check out my threads for those.
Lets start with the oldest Kickstart 1.2 A500. This one seems to have taken a beating with damage to the casing, a missing key cap and is a bit grubby but otherwise looks ok. This will also be a nice one to break me back in to the Amiga, I've never used them heavily so once again will be a learning experience.


I took the opportunity to open up the case and inspect the board. I also discarded the RF shielding. Apart from being a bit dusty and dirty in places looks ok.

I ran the Amiga Test Kit Diagnostics by Kier Fraser, all tests pass ok which is good news. The disk drive works without issue, loaded a number of disks. With the fundamentals looking good I decided to fully strip down and clean the machine.
First thing I wanted to do was attempt to repair the broken casing, if held in the right position the crack next to the cursor keys was barely visible so should be a relatively easy repair. The scuff on the corner I've left as is, not sure there is much that can be done with that. I opted for araldite epoxy for the repair, much stronger than superglue and probably now the strongest part of the case. After a couple of hours it has set enough to remove the excess but was still soft enough to do with a sharp blade. I then used a bit of scotch brite to smooth it, probably not the best thing to use but it was within arms reach
Here it is mid repair prior to removing the excess epoxy:

In the meantime I set about washing the rest of the casing and stripping the keyboard. The keyboard wasn't awful but you can't beat a fresh clean keyboard on these old machines.
I removed all the keys apart from the larger ones with support brackets, didn't want to push my luck by breaking something and I was still able to get underneath to clean. Here is a before and after shot:


Keys out to dry after washing:

Once fully dried I set about reassembly. Definitely more satisfying than pulling it apart

Just after that tense moment where you hope you haven't misplaced any springs. The eagle eyed will notice there is now an escape key, I stole this from the A500 Plus. This keyboard was purely a missing keycap and spring with the stem still intact and working. The 500 Plus is missing the decimal point key from the number pad but it looks like the stem itself is either missing or crushed so that one will need a more in depth repair when the time comes and I can source the required parts.
Fully reassembled at last:

Once all the casing was dry I set about reassembly. While partially assembled I open up the floppy drive, gave the heads a clean and put a bit of lithium grease on the drive rails and motor spindle. The drive is still rather noisy when seeking but a little better. For those that have come across more than I have, are some of the drive mechs inherently more noisy than others depending on the design? They could have been like this from new for all I know, the newer 500 w/1.3 Kickstart is much quieter. I also gave the expansion edge connector and trap door connector pins a quick clean with some IPA.

With that complete I set about completely reassembling the machine. Here is the finished result, I am very pleased with how it has turned out. I re-ran the diagnostics, rechecked the keyboard etc and all looks good.

I have a couple of upgrades in the works for this one. Firstly I have installed an A501 RAM expansion, this actually came out of the other 500 (more on that RAM expansion to come in another thread, it involved a Varta battery). For display I purchased a Retro Computer Shack RGB SCART cable.
In the post I have a DF0 / DF1 switcher to allow booting from an external floppy drive, I decided to keep the internal drive, I much prefer the look over a Gotek, even the more discreet ones. I intend to run a Gotek externally for loading self booting games as DF0 or use as DF1 to allow me to save my work when carrying out productivity tasks with Workbench or whatever programme I'm using loaded from the internal floppy drive. Note when the external drive is switched to DF0 the internal drive gets disabled, hence me still intending to load Workbench etc from the internal drive when I want multiple drives available to cut down on disk swapping. This might sound like a bit of a faff but I'm happy enough with that solution for now, bear in mind I'm building my A1200 Checkmate project which will be my 'big box' Amiga with Compact Flash drive and the other niceties of that platform.
I'm also weighing up buying a USB mouse adapter, anyone used one or have a particular recommendation for one of these?
That's about it for now, more to follow soon. I'm planning to try and spend some time with this particular Amiga now so will report back some of the stuff I'm doing with it as I go. Restoring these machines can be a hobby in itself, sometimes you forget to get involved and use them. I'll leave you with a game of Lemmings:

Last edited:

